Reseller Setup Guide — Onboarding a Merchant End-to-End
P2P Transfer Platform · English edition
A step-by-step guide for a reseller operator to stand up a new merchant: create it, give its owner a login, and wire up the money rails (slip verification, payment gateway, bank account).
⚠️ Under active development. The slip-provider and payment-gateway screens are still being finished — field labels may shift slightly from what's shown here.
Table of contents
- Before you start
- 1. Create a merchant
- 2. Create a merchant owner account
- 3. Set up a slip-verification provider (reseller tier)
- 4. Set up a payment gateway
- 5. Set up a bank account (reseller tier)
- Quick reference
Before you start
1. You need the operator grant. All five procedures require your reseller to have the "can create merchants" grant switched on by a platform administrator. Without it, these screens show "You are not permitted to… Ask an administrator to enable this for your reseller." Ask your admin to enable it (admin → Resellers → your reseller → toggle Can create merchants).
2. Who can do what:
| Task | RESELLER_OWNER | RESELLER_STAFF | MDR |
|---|---|---|---|
| Create merchant · invite merchant owner · per-merchant gateway | ✅ | — | — |
| Slip provider · reseller-tier gateway · bank account | ✅ | ✅ | — |
3. How the rails are chosen (inheritance). For each of slip verification, payment gateway, and bank account, a merchant uses its own setting if it has one, otherwise yours (the reseller tier), otherwise the platform default:
merchant → reseller → platform
So set up the reseller tier (steps 3, 4a, and 5) once and every merchant you own inherits it — or override per-merchant (step 4b) when a specific merchant needs its own rail.
4. Feature flag. Your reseller-tier payment gateway (step 4a) and bank accounts (step 5) only take effect in live deposit routing when FEATURE_RESELLER_GATEWAY_TIER is ON (default OFF in most environments). The slip-provider tier (step 3) is live regardless.
1. Create a merchant
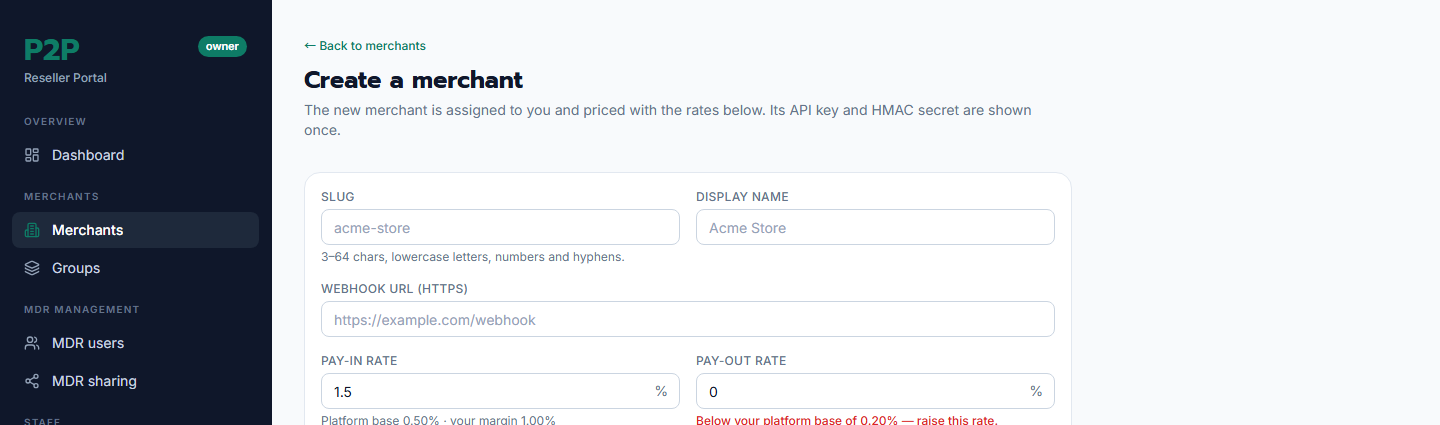
Creates the merchant, assigns it to you, sets its fee rates, and hands you its API credentials.
Where: Reseller portal → Merchants → Create merchant
Steps:
- Slug — the merchant's unique handle. 3–64 characters: lowercase letters, numbers, and hyphens (e.g.
acme-store). - Display name — the merchant's human-readable name (e.g.
Acme Store). - Webhook URL (HTTPS) — where the platform will POST settlement events. Must be
https://. - Pay-in rate (%) — the deposit fee the merchant pays. The form shows your floor and margin live: "Platform base 0.50% · your margin 1.00%". You cannot go below the platform base — a too-low rate shows "Below your platform base of 0.20% — raise this rate" in red.
- Pay-out rate (%) — the withdrawal fee, with the same floor rule.
- Accept the DPA — tick "I accept the platform Data Processing Agreement on behalf of this merchant." The merchant goes live (Active) only if you accept it; otherwise it's created Suspended.
- Click Create merchant (enabled once all fields are valid).
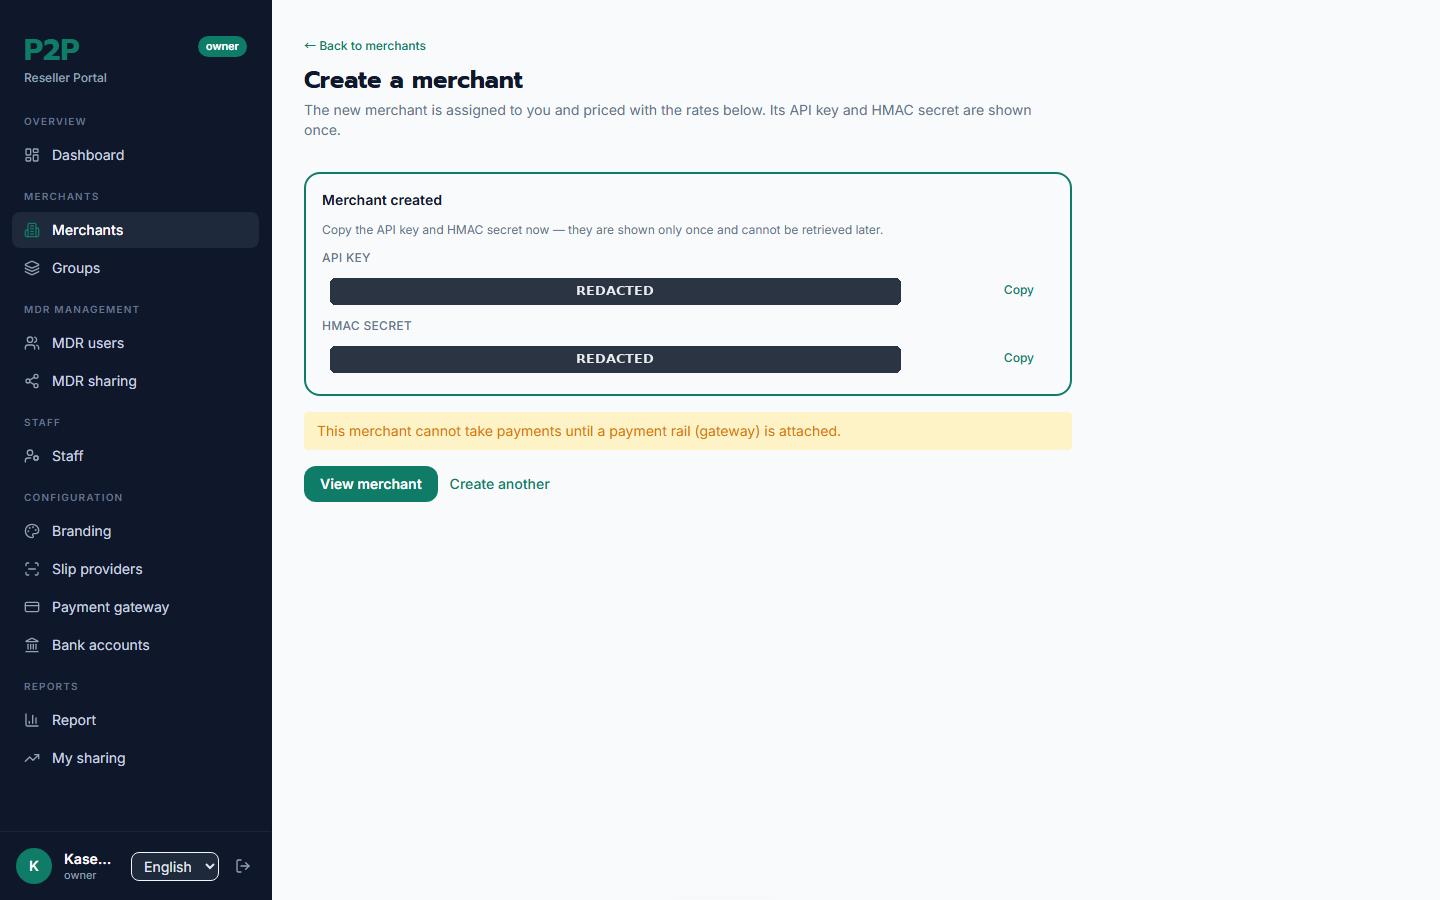
Result: the merchant's API key (sen_live_…) and HMAC secret are shown once — copy them immediately and hand them to the merchant securely; they're never shown again. The merchant is created but inert until it has a payment rail (see step 4).
Common issues:
- Rate rejected → your rate is below the platform base; raise it.
- Slug already taken → pick a different slug.
- "Not permitted" → the operator grant isn't enabled (see "Before you start").
2. Create a merchant owner account
Gives the merchant its first back-office login (a Merchant Owner), who can then invite their own operators and viewers.
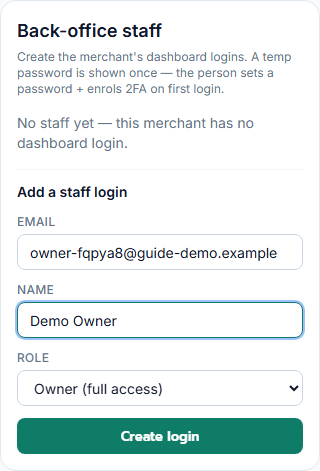
Where: Reseller portal → Merchants → open the merchant → Back-office staff section
Steps:
- Open the merchant from your Merchants list and scroll to Back-office staff.
- Under Add a staff login, fill in:
- Email — the owner's login email.
- Name — their name (e.g.
John Fulton). - Role — select Owner (full access) (Operator and Viewer are also available). - Click Create login.
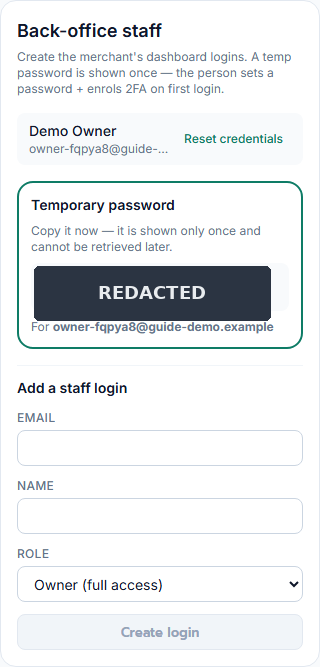
Result: a temporary password is shown once — copy it and give it to the owner (they set a permanent password and enrol 2FA on first login). The owner then appears in the staff list with a Reset credentials action if they ever lose access (this issues a new temporary password, clears their 2FA, and ends their sessions).
Common issues:
- Email already used → that email already has a staff account for this merchant.
- "Not permitted" → this is OWNER-only and needs the operator grant.
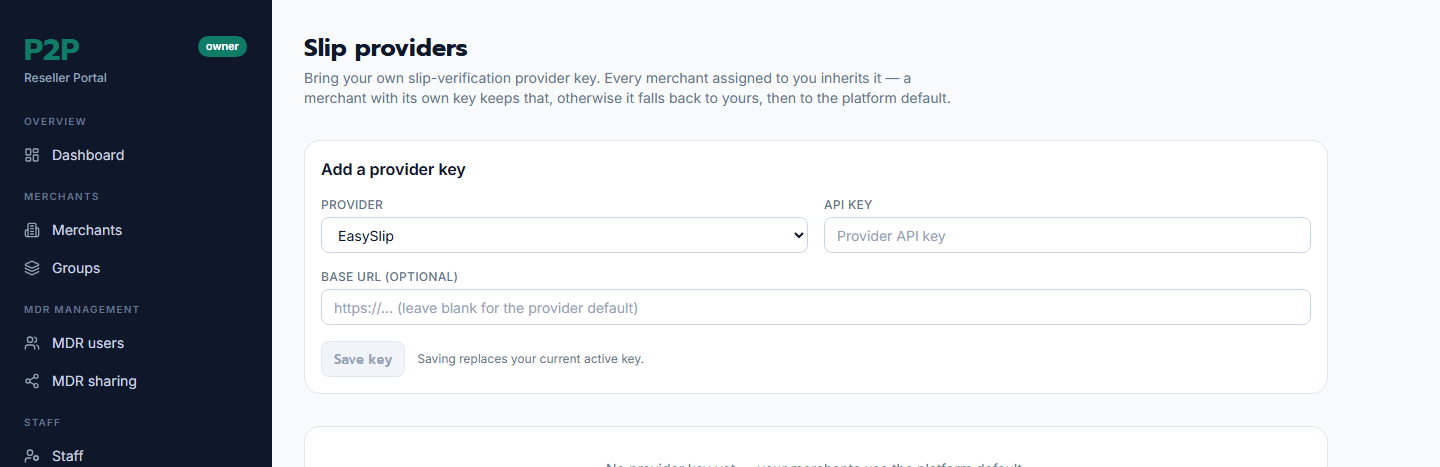
3. Set up a slip-verification provider (reseller tier)
Registers your slip-verify provider key; every merchant you own that doesn't have its own inherits it.
Where: Reseller portal → Slip providers
Steps:
- In Provision your slip-verify provider key, choose the Provider (e.g. EasySlip, MockBank, HippoPay).
- Enter the API key (stored encrypted, never shown again).
- Optionally enter a Base URL (defaults to the provider's standard endpoint if left blank).
- Click Provision. This rotates any previous active key in one step.
- In the table, click Test to verify the connection — paste a real QR payload (and optionally an expected amount) and Run test; you'll see success plus latency, or the provider's error.
- Use Activate / Deactivate to control which key is live. With no active key, your merchants fall through to the platform default.
Result: one active provider per reseller, inherited by all your merchants that lack their own.
Common issues:
- "Not permitted" → needs
MANAGE_SLIP_PROVIDERSplus the operator grant.
4. Set up a payment gateway
A payment gateway is what lets a merchant accept deposits. You can set one at the reseller tier (all your merchants inherit it) or per-merchant (just one).
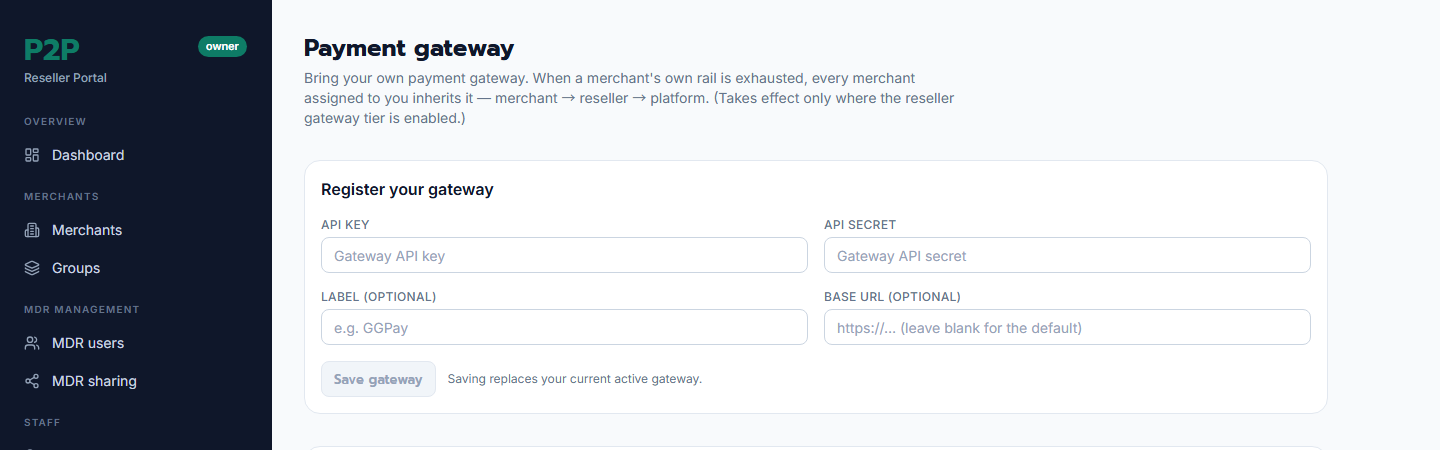
4a. Reseller tier — all your merchants inherit
Where: Reseller portal → Payment gateways
Steps:
- In Provision your payment-gateway account, enter the API key and API secret (both stored encrypted, never shown again).
- Optionally add a Label (e.g.
Primary account) and a Base URL. - Click Provision (rotates any prior active credential).
- Click Test on the row to check connectivity — you'll see the gateway balance plus latency, or an error.
- Use Activate / Deactivate to control which credential is live.
⚠️ Remember the feature flag. The reseller-tier gateway only enters live deposit routing when
FEATURE_RESELLER_GATEWAY_TIERis ON.
4b. Per-merchant — just this merchant
Where: Reseller portal → Merchants → open the merchant → Payment gateway section (see the screenshot in step 2 — right column: "Register the payment rail so this merchant can accept deposits.")
Steps:
- Open the merchant. In Payment gateway, note the status ("No payment gateway registered yet — this merchant cannot take payments until one is added.").
- Under Register a PGWAY gateway, enter the API key, API secret, and optional Label and Base URL.
- Click Register.
- Use Activate / Deactivate on existing rows to control the live credential.
Result: registering the first gateway makes the merchant transactable. A merchant with no gateway of its own falls back to your reseller-tier gateway (if enabled), then the platform.
Common issues:
- "Not permitted" → per-merchant is OWNER-only; both tiers need the operator grant.
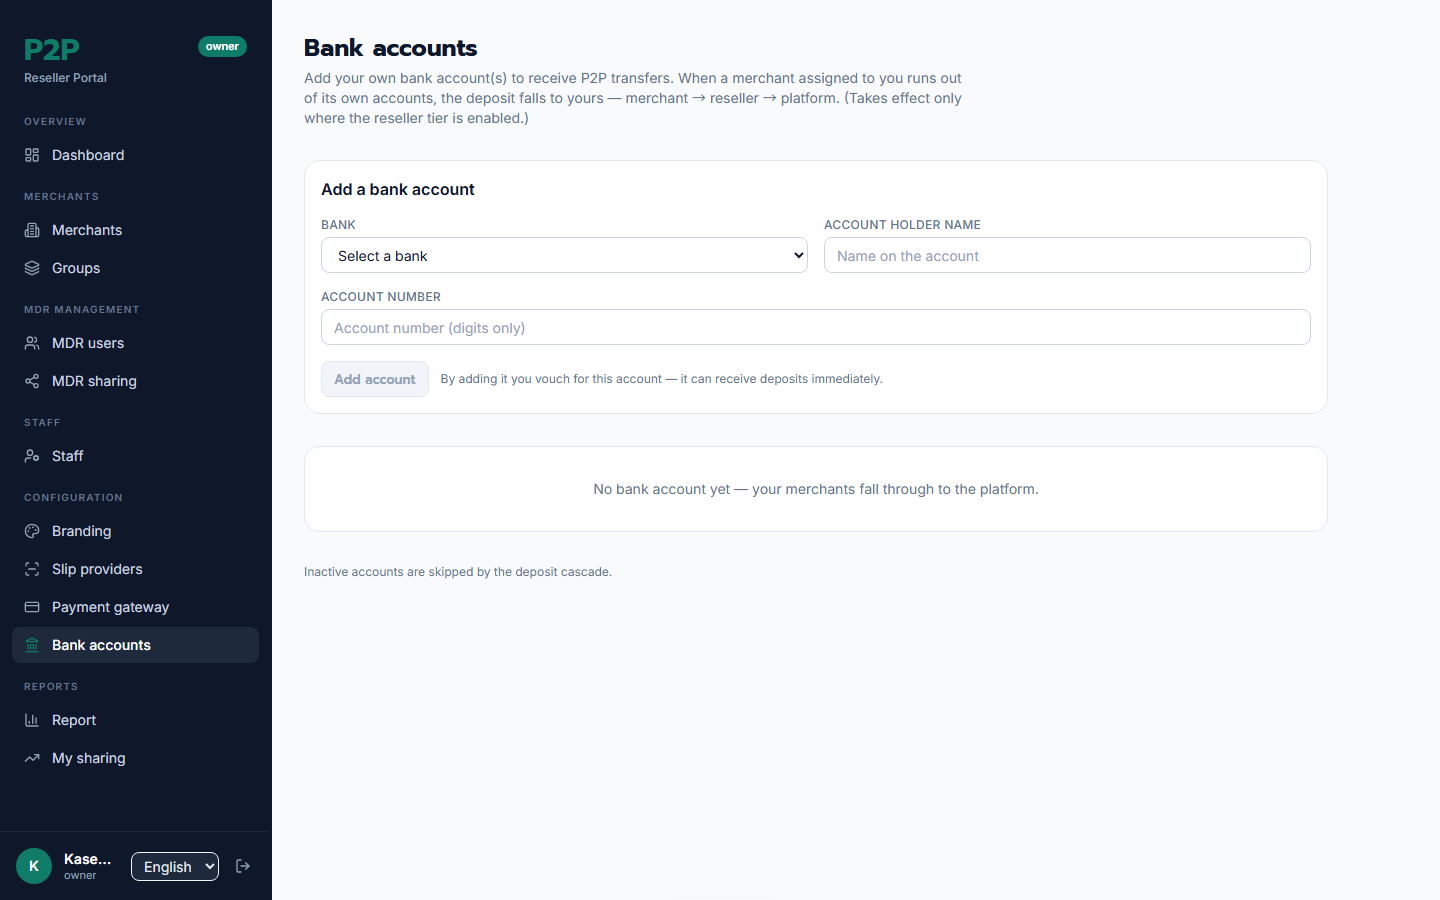
5. Set up a bank account (reseller tier)
Adds a bank account to your reseller pool; deposits routed through your reseller rail can land here.
Where: Reseller portal → Bank accounts
Steps:
- In Add your bank account, choose the Bank (Thai bank list, e.g. Kasikornbank / KBANK).
- Enter the Account holder name (e.g. your company name).
- Enter the Account number (digits, 6–32 characters).
- Click Add account. Your account is vouched immediately (verified) and joins your pool.
- Use Activate / Deactivate to include or exclude an account from routing (the cascade round-robins over active accounts and skips inactive ones).
⚠️ Feature flag. These accounts only receive deposits via the cascade's reseller leg when
FEATURE_RESELLER_GATEWAY_TIERis ON.
Result: verified reseller-owned bank accounts; only the last four digits are ever shown after saving. Multiple accounts are allowed (there's no "one active" limit — toggle each independently).
Common issues:
- Duplicate → that bank plus account number is already in your pool.
- "Not permitted" → needs the deposit-rail operator permission plus the operator grant.
Quick reference
| # | Task | Permission | Roles | Where |
|---|---|---|---|---|
| 1 | Create merchant | CREATE_MERCHANT |
OWNER | Merchants → Create merchant |
| 2 | Invite merchant owner | MANAGE_MERCHANT_STAFF |
OWNER | Merchant → Staff |
| 3 | Slip provider (reseller) | MANAGE_SLIP_PROVIDERS |
OWNER, STAFF | Slip providers |
| 4a | Payment gateway (reseller) | MANAGE_PAYMENT_GATEWAYS |
OWNER, STAFF | Payment gateways |
| 4b | Payment gateway (merchant) | MANAGE_PAYMENT_GATEWAYS |
OWNER | Merchant → Payment gateway |
| 5 | Bank account (reseller) | MANAGE_PAYMENT_GATEWAYS |
OWNER, STAFF | Bank accounts |
All six require: reseller status ACTIVE plus the platform grant can create merchants. The reseller-tier gateway (4a) and bank accounts (5) additionally need FEATURE_RESELLER_GATEWAY_TIER ON to affect live routing.